Whether you’re a professional photographer or weekend hobbyist you’ll know the importance of a good edit - and if you take a look at the before and after images below you can see just how powerful good editing software can be!
I recently partnered with Adobe Creative Cloud to cover one of my favourite Lightroom Classic CC tools - the Radial Filter. The Radial Filter essentially allows you to draw a circular shape of any size over your image and make corrections to either everything inside, or outside the selected area.
In this tutorial I give a step by step guide to how I gave a lifeless aerial image a beautiful sunrise glow - and how I used the Radial Filter to do so.
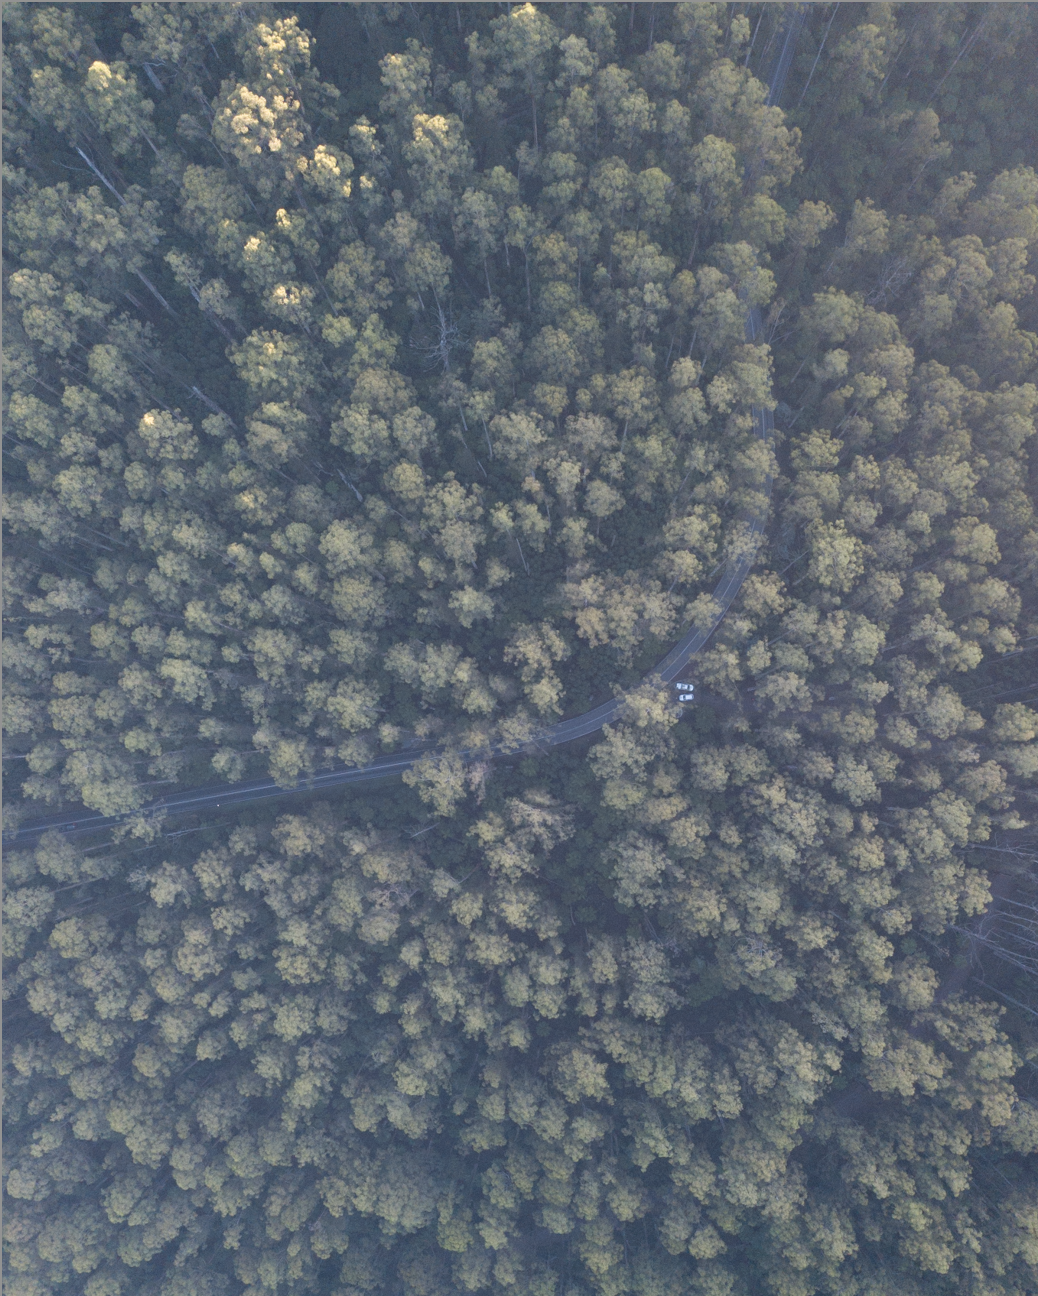
BEFORE
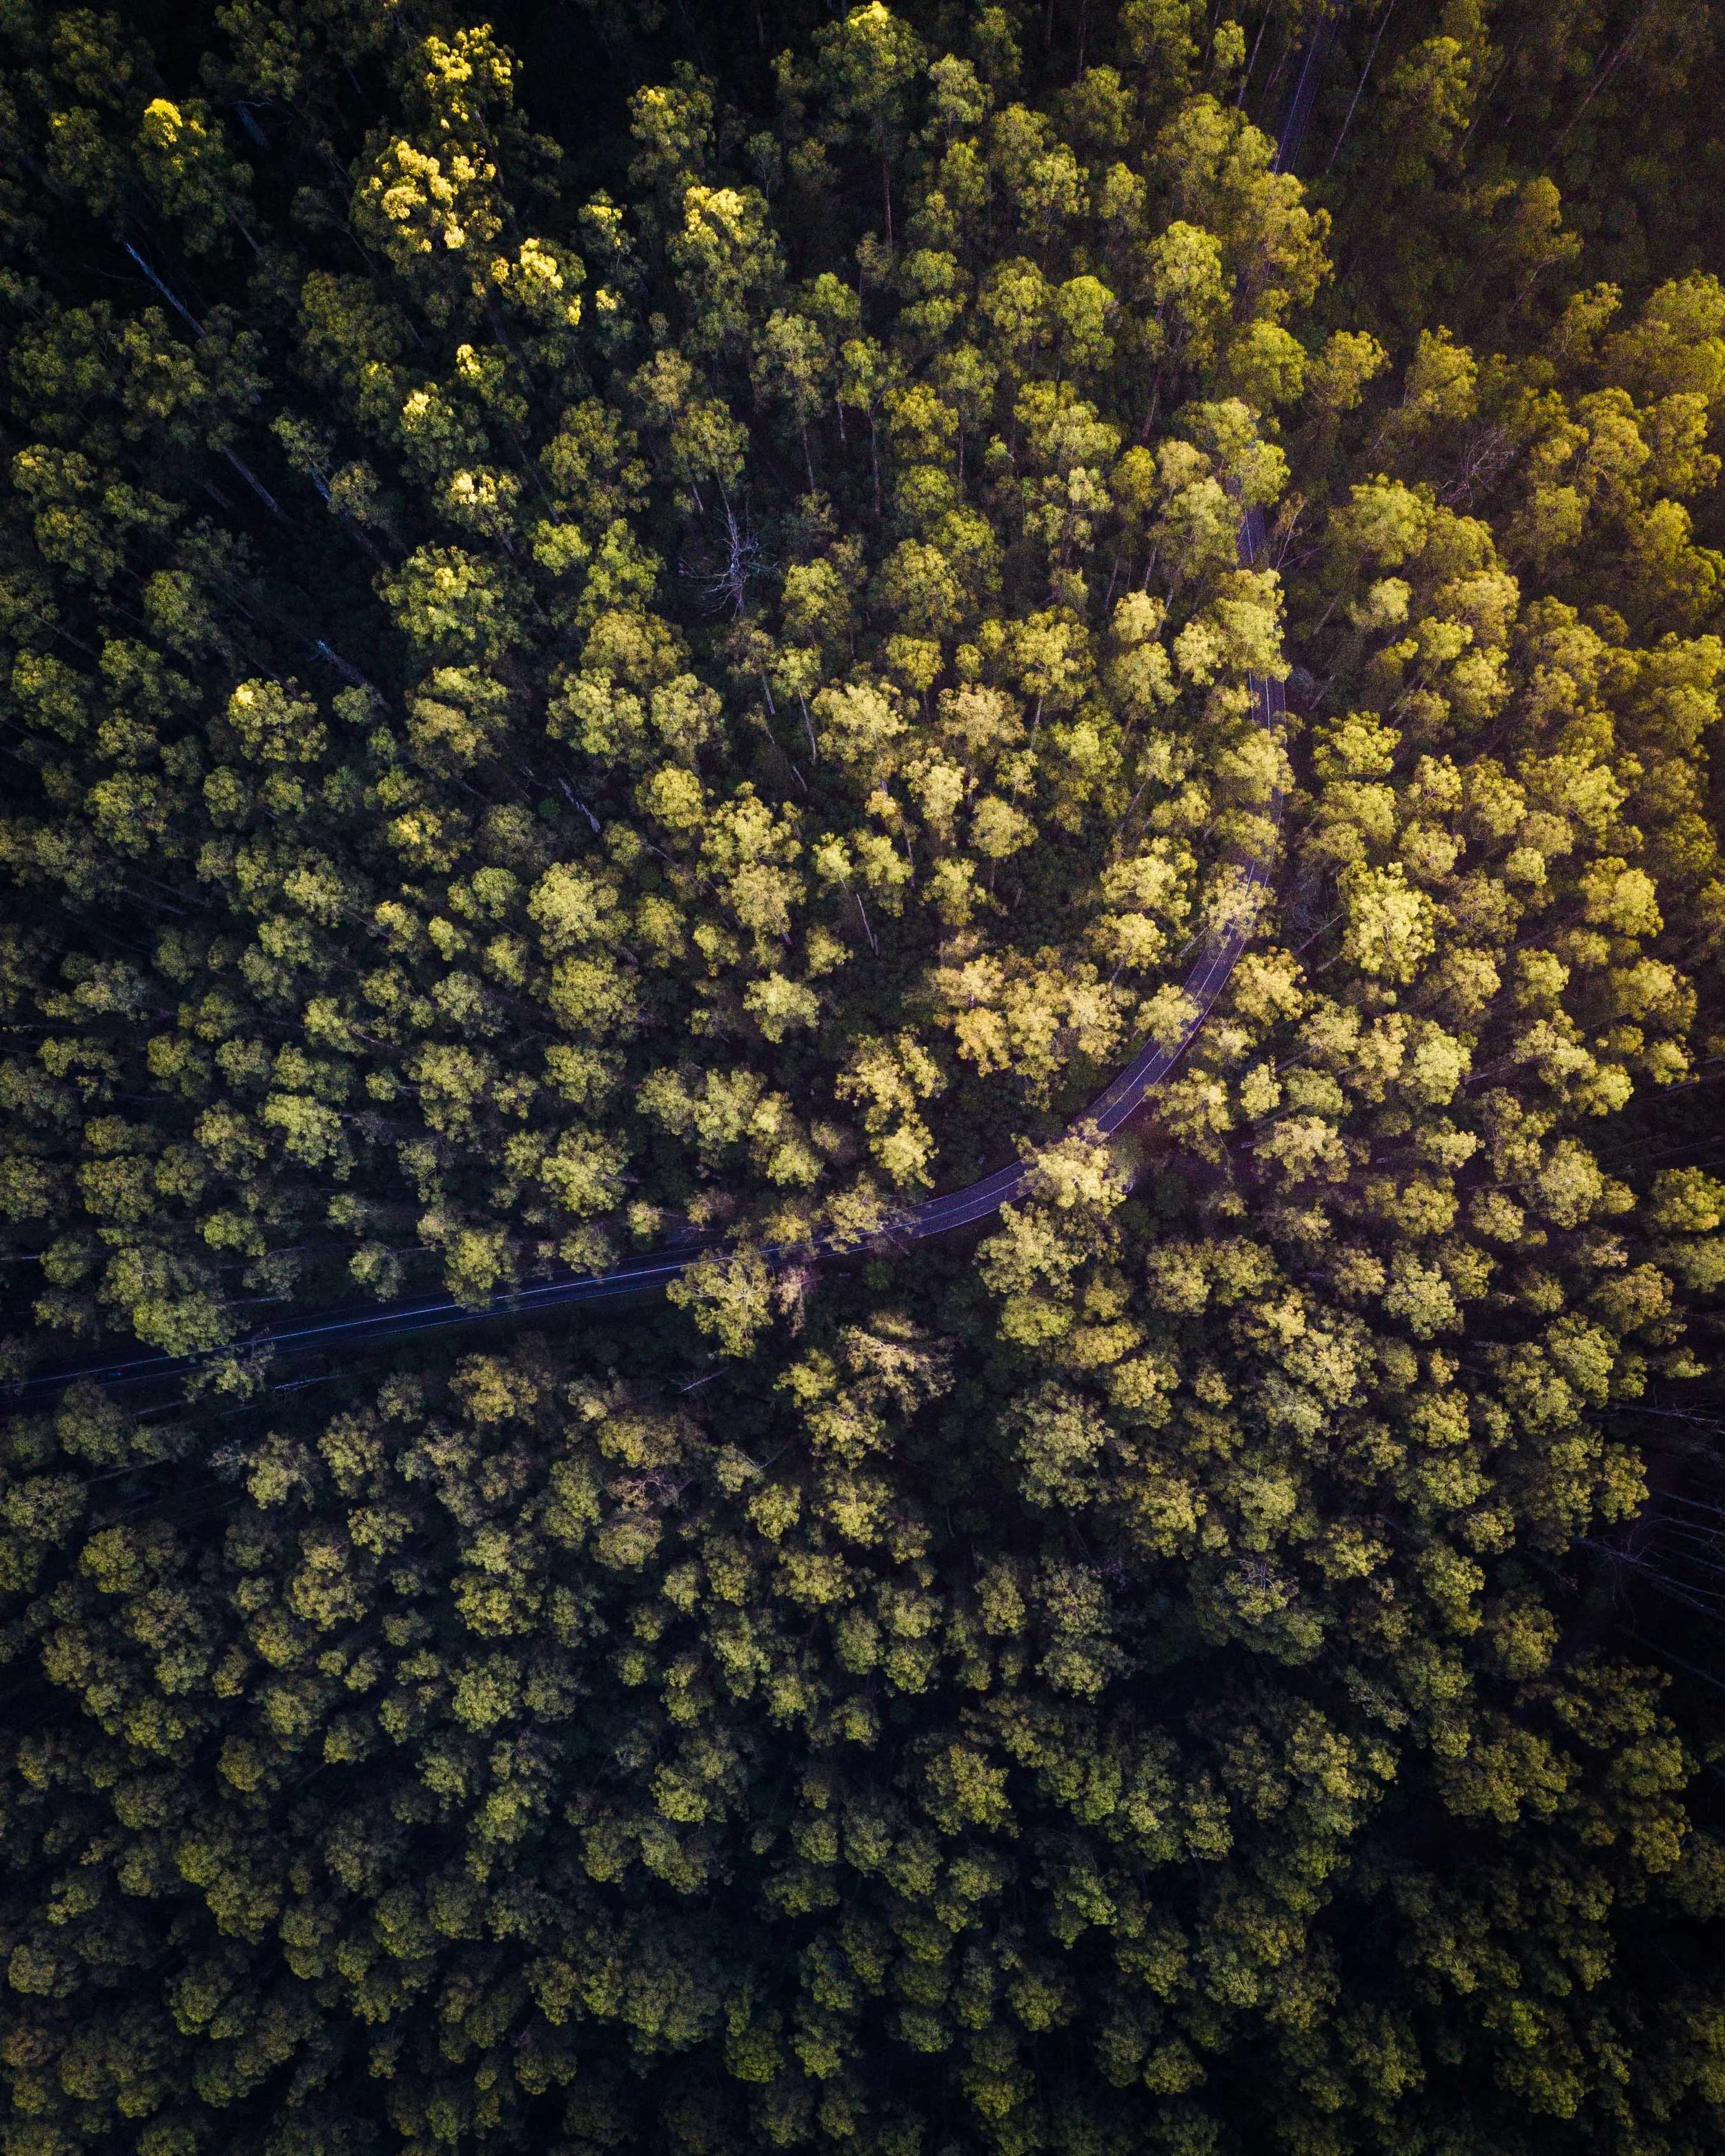
AFTER
Step One: Basic Adjustments & Spot Removal
Increase Warmth, Contrast, Clarity & Vibrance
Decrease Exposure, Shadows, Whites & Blacks
Use ‘Spot Removal’ tool to remove cars


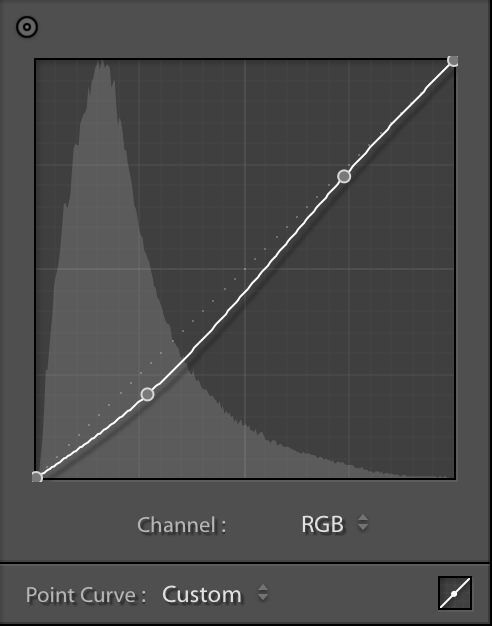
Step Two: Tone Curve Adjustments
Slightly decrease darks & lights

Step Three: Colour Adjustments
Increase Saturation of Orange & Yellow
Increase Luminance of Orange & Yellow


Step Four: Radial Filter (1)
Using Radial Filter select desired area
Invert mask to act on everything inside selection
Increase Warmth, Exposure, Highlights & Saturation to create warm orange glow


Step Five: Radial Filter (2)
Using another Radial Filter select same area as Radial Filter (1)
This will act on everything outside selected area
Decrease Exposure to excentuate sunrise glow


So that’s it! In five basic steps I’ve been able to completely transform my image using Lightroom Classic CC and the Radial Filter. If you aren’t already using Adobe Creative Cloud and would like a free trial click here - or if you have any questions on this tutorial feel free me to drop a note in the comments section below.
Bonus Tip: It’s important to shoot in RAW to be able to pull the most information out of the image when editing. This particular image was shot on the DJI Mavic Pro with uses the .dng RAW file format.
